How to Make Pizza Crust Crispy at Home: 9 Easy Fixes
If your homemade pizza tastes good but bends like a wet napkin, the problem is not your love for pizza. It is heat, moisture, and timing. I learned how to make pizza crust crispy at home by treating the crust like toast: give it direct heat, keep it dry, and never trap steam underneath after baking.
A crispy pizza base needs more than a hot oven. It needs a preheated baking surface, a short parbake, light toppings, and a finish that keeps the bottom crunchy.
Why Homemade Pizza Crust Turns Soft
Most home ovens heat the top of the pizza better than the bottom. Cheese melts, sauce bubbles, and the edges brown, but the base sits on a cool pan or parchment long enough to steam.
King Arthur Baking explains that bottom browning depends on conduction, meaning direct heat transfer from the baking surface to the dough. A surface with strong thermal mass can store heat and deliver it quickly to the underside of the pizza. That is what creates a browned, crisp base instead of a pale, floppy one.
Moisture is the second issue. Sauce, fresh mozzarella, mushrooms, onions, peppers, and overloaded toppings all release water. If the dough is raw when that moisture hits, the center turns soft before it has a chance to crisp.
Start With the Right Baking Surface
The fastest improvement I made was baking pizza on a preheated surface instead of a room-temperature pan. A cold pan protects the dough from heat. A hot surface attacks the bottom immediately.
Baking Steel, Stone, or Sheet Pan?
A baking steel is the strongest option because metal stores and transfers heat quickly. King Arthur Baking recommends preheating a baking steel for an hour before baking pizza for the best bottom browning. A baking stone also works well when it is fully preheated, while a metal half-sheet pan is the simplest backup.
If you make pizza often, use a baking steel. If you bake occasionally, use a pizza stone. If you only have a baking sheet, flip it upside down and preheat it. The flat bottom makes sliding pizza easier and gives the crust better contact.
Preheat Longer Than Feels Reasonable
A crispy crust starts before the dough enters the oven. Set the oven to its highest normal baking temperature, usually 450°F to 500°F. Place the steel, stone, cast-iron skillet, or inverted baking sheet inside while the oven heats.
I preheat for 45 to 60 minutes. That sounds excessive, but it matters. King Arthur’s pizza crust guidance recommends preheating a stone for 45 to 60 minutes when you want a deep golden, crispy crust.
The oven may beep after 15 minutes, but the baking surface is not fully charged yet. Wait longer. That stored heat is what gives the dough its first crisp shock.
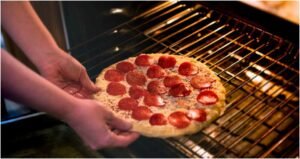
Parbake the Dough Before Topping
Parbaking changed my pizza more than any topping upgrade. Instead of loading sauce and cheese onto raw dough, bake the bare crust first until it looks matte and slightly set.
For thin pizzas, I parbake for 3 to 5 minutes at 450°F to 500°F. The surface should look dry, not browned. Then I pull it out, add sauce and toppings, and return it to the oven.
King Arthur also recommends parbaking an untopped crust until it looks pale and matte, then topping it and finishing the bake. Their standard pizza crust method uses a longer parbake for thicker crusts, but the principle is the same: set the dough before moisture arrives.
This is the easiest answer to how to make pizza crust crispy at home when your center always turns soggy.
Control Moisture Before It Ruins the Crust
A crispy pizza is built with restraint. More sauce and more toppings may look generous, but they often punish the crust.
Use Less Sauce
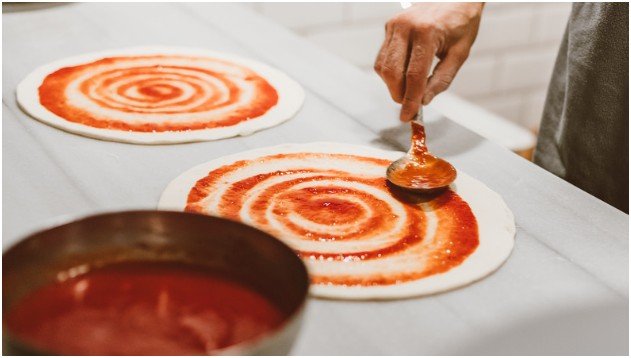
Use a thin layer of sauce, especially in the middle. I spread it almost like paint, not soup. The dough should still show through in a few spots.
For thin crust, push a light layer of sauce close to the edge. This helps the outer rim crisp and prevents a thick wet ring near the center.
Pick Low-Moisture Cheese
Fresh mozzarella tastes beautiful, but it releases water. For crisp home pizza, low-moisture block mozzarella works better. Grate it yourself if possible. Pre-shredded cheese works in a pinch, but fresh-grated cheese melts cleaner.
If you want fresh mozzarella, slice it early and blot it with paper towels. Add it sparingly.
Pre-Cook Watery Toppings
Mushrooms, onions, bell peppers, spinach, and zucchini need help before they hit the pizza. I sauté or roast them first, then cool them slightly. This removes excess water and adds flavor.
Meat toppings should also be cooked before baking unless your recipe clearly says otherwise. FoodSafety.gov advises using a food thermometer to confirm safe internal temperatures for meat, poultry, seafood, and other foods.
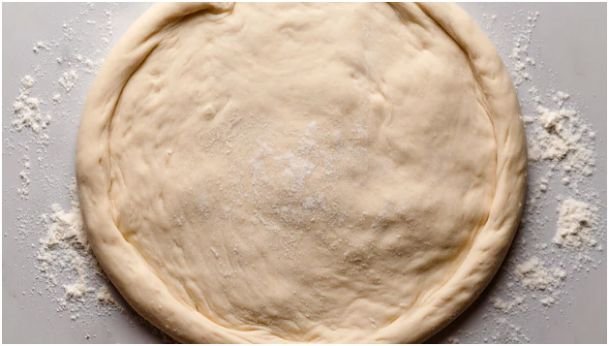
Shape the Dough for Crispness
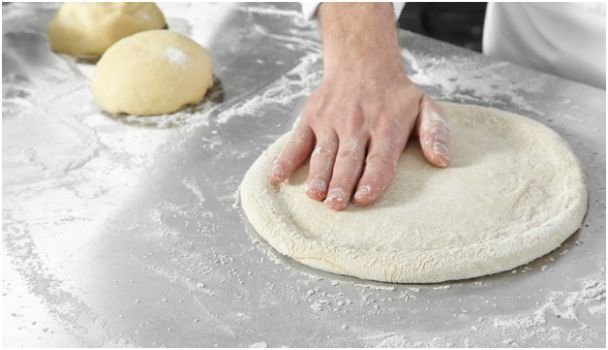
The way you shape the dough decides what kind of crisp you get. Airy crispness and cracker crispness need different handling.
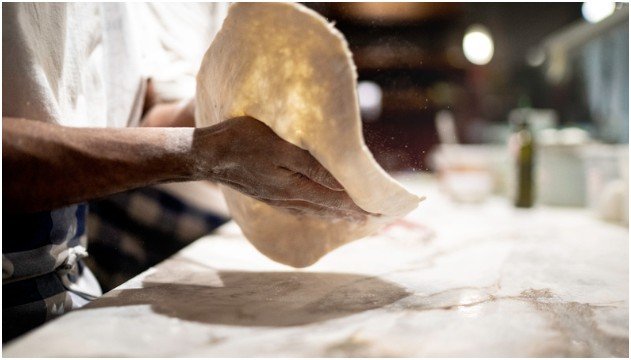
Stretch for Airy Crispness
For a pizzeria-style crust, stretch the dough by hand. Do not crush every bubble. Those air pockets help the crust feel light instead of dense.
Bread flour helps when you want a chewy-crisp base because it has stronger gluten potential. King Arthur lists its bread flour at 12.7% protein, which gives dough more gluten-forming strength than lower-protein flours.
Use this path when you want a crisp bottom with a tender, airy edge.
Roll for Thin Cracker-Style Pizza
For thin, cracker-style pizza, ignore the “never roll pizza dough” rule. Roll it. The goal is not an airy rim. The goal is a stiff, crackly base.
Roll the dough to about 1/8 inch or thinner. Then dock it with a fork across the whole surface. Docking stops giant bubbles from puffing up in the center.
My Thin Cracker-Style Crust Method
When I want ultra-crispy pizza, I use a low-hydration dough with very little yeast. The dough feels stiff, but that is the point.
Mix 2 cups all-purpose flour, 1/2 cup room-temperature water, 2 tablespoons olive oil, 1 teaspoon sugar, 1/2 teaspoon instant yeast, and 1 teaspoon salt. Knead for 5 minutes. The dough should feel dry, not soft.
Refrigerate it in a sealed container for 24 hours. That cold rest makes the dough easier to roll thin without shrinking back. Bring it to room temperature for 1 hour before shaping.
Roll it paper-thin, dock it fully, and parbake it on a hot stone, steel, or inverted sheet pan for 3 to 4 minutes at 450°F. Add a thin layer of sauce, low-moisture cheese, and light toppings. Bake for another 5 to 7 minutes until the edges turn golden and the bottom feels stiff.
This method gives a tavern-style crunch rather than a soft foldable slice.
Finish Hot, Then Rest on a Rack
During the last 2 to 3 minutes, I move the pizza higher in the oven or switch briefly to broil. This melts the cheese fast and browns the edges without giving the sauce more time to soak downward.
Watch closely. Broilers can turn golden pizza into burnt pizza fast.
Once the pizza comes out, do not leave it on a cutting board. Move it to a wire rack for 2 to 3 minutes. Steam trapped under the crust softens all your hard work. A rack lets air circulate underneath and keeps the bottom crisp.
This small step is the quiet hero of how to make pizza crust crispy at home.
Crispy Crust Troubleshooting
If the bottom is pale, preheat the baking surface longer or move the rack lower. If the top burns before the bottom crisps, lower the rack and skip broiling until the final minute.
If the center is soggy, use less sauce, parbake longer, and reduce toppings. If the crust is hard but not pleasant, the dough may be too dry or rolled too aggressively for the style you want.
If the pizza sticks, dust the peel with semolina or flour and launch quickly. Parchment can help beginners, but remove it during the final bake if your oven temperature allows and the crust needs more direct heat.
If you want a puffier pie with charred edges, try the internal guide on homemade Neapolitan pizza without pizza oven and compare that method with this crisp-crust approach.
FAQs
1. How do I make pizza crust crispy without a pizza stone?
Use an inverted metal baking sheet or cast-iron skillet and preheat it for 45 minutes before baking.
2. Should I parbake pizza dough for a crispy crust?
Yes, parbake the bare dough until matte and set before adding sauce, cheese, and toppings.
3. Why is my homemade pizza crust soggy in the middle?
Too much sauce, wet cheese, raw vegetables, or a cold baking pan usually causes a soggy center.
4. How to make pizza crust crispy at home with thin dough?
Roll the dough very thin, dock it with a fork, parbake it, top lightly, and finish on a hot surface.
Final Bite: Make the Bottom Bossy
Crispy pizza crust is not luck. It is a little bossy, and I respect that. Heat the surface hard, parbake the dough, keep toppings light, and let the finished pizza breathe on a rack.
The next time your crust tries to go soft, blame the moisture, not your oven. Then preheat longer, top smarter, and make the bottom fight back.